
RiCoder Backup and Restore
Note: This article applies to RiCoder version 11 and later. In earlier versions, backups are configured in the installation wizard and saved to Yandex.Disk only (see RiCoder Backup).
This article describes the built-in RiCoder backup mechanism. You will learn:
- How to set up automatic saving of backups on the server and in the Yandex.Disk cloud.
- How to create a backup manually or restore RiCoder from an existing backup.
- What limitations apply and how to fix common setup errors.
1. Introduction
RiCoder creates a backup using Docker containers. The result is an archive file in .dump format that contains a complete snapshot of all data, settings and events at the time of the backup. This file is not a working database, but it allows you to fully restore the system after a failure or an update error.
1.1. Where backups are stored
A backup is always saved locally on the server where RiCoder is installed. If the Yandex.Disk connection settings are configured, the same file is automatically duplicated to the cloud storage.
Saving backups to a network drive within the organization's local network or to an external drive is not supported: backups are saved only to the local disk of the server where RiCoder is installed.
Local backup on the server (always saved)
By default, backups are saved to the CHOP_DEPLOY/backups folder every 24 hours after the first start. If necessary, you can change the local folder and change the schedule.
Yandex.Disk (saved optionally)
The backup is uploaded to the Yandex.Disk cloud folder specified in the web panel. Learn more...
1.2. Limitations
RiCoder does not provide automatic rotation of dump files: old backups are not deleted automatically. With a large amount of data, it is recommended to:
- Periodically delete old dump files manually.
- Monitor free space on the server and on Yandex.Disk.
2. Backup creation scenarios
A backup in RiCoder can be created in three ways: automatically at startup, on a set schedule, or manually at any time. The specifics of each method and the naming format of dump files are described below.
2.1. Automatically at RiCoder startup
A backup is created each time the backup container starts (installation, update, restart). The prefix start- is added to the beginning of the file name.
Example: start-2026-10-13_12-00-00.dump
2.2. On schedule
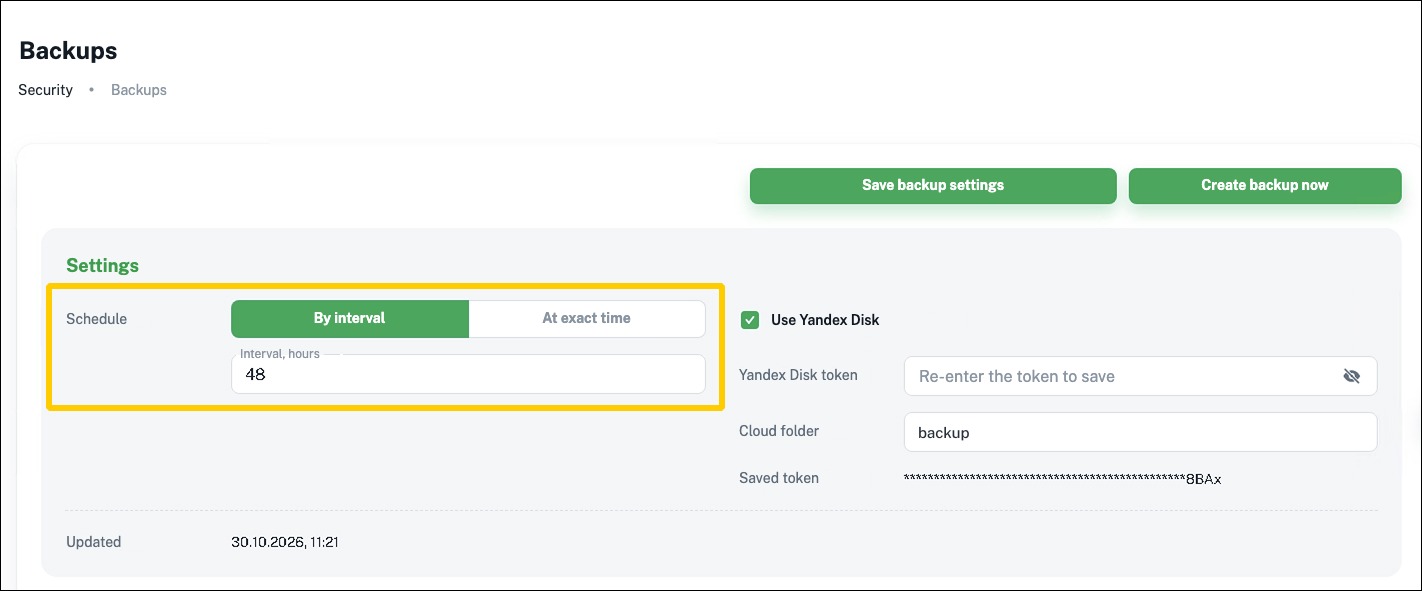
For regular backups, use the settings in the Schedule block. Two modes are available:
- By interval: a backup is saved every N hours (from 1 to 96).
- At exact time: a backup is saved at a specific time (HH:MM). If the time has already passed, the backup will be created the next day.
File name without a prefix in the "Date_Time" format:2026-10-13_12-00-00.dump
Important: The time in the schedule and in file names corresponds to the time zone of the backup container, not to Moscow time. Take the difference into account when setting up the schedule.
Learn more about setting up the schedule...
2.3. Create backup now
A manual start lets you create a backup at the right moment without waiting for the schedule. This is useful before making critical changes to RiCoder or before an update. Click the Create backup now button in the upper right corner of the Backups section.
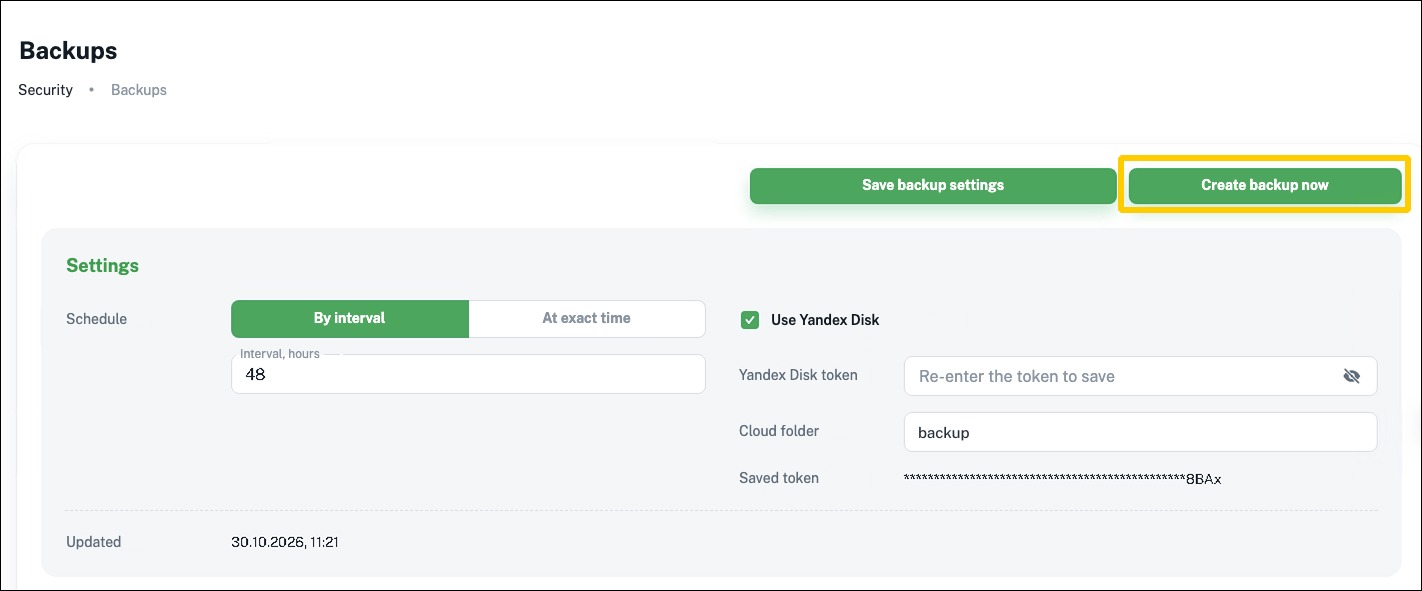
File name without a prefix in the "Date_Time" format: 2026-10-13_12-00-00.dump
The backup is created in the background. After the "Backup creation has been queued" notification, wait a couple of minutes and click Refresh list. A new file with the current time should appear on the Local tab (and also on the Yandex Disk tab if the cloud service is configured).
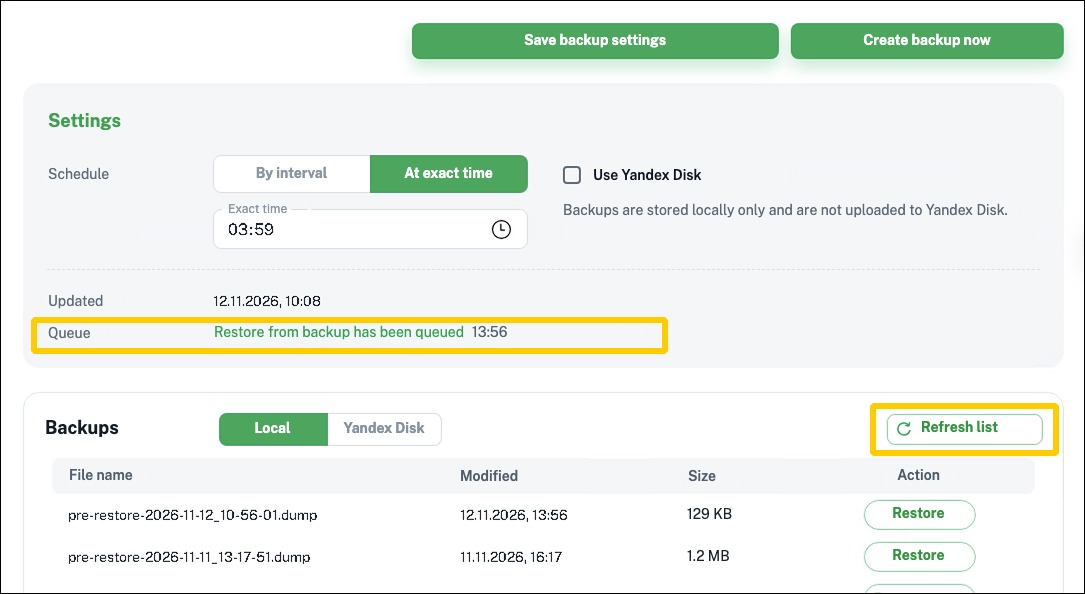
Note: Clicking the Create backup now button again will not stop the current backup process and will not create a second backup. Wait until the process is complete — a row with the name of the created file should appear in the list.
3. Backup list
The web panel has two lists: backups stored on the server (Local) and backups uploaded to the Yandex.Disk cloud (Yandex Disk). Each list shows .dump files with the modification date and size, newest first.
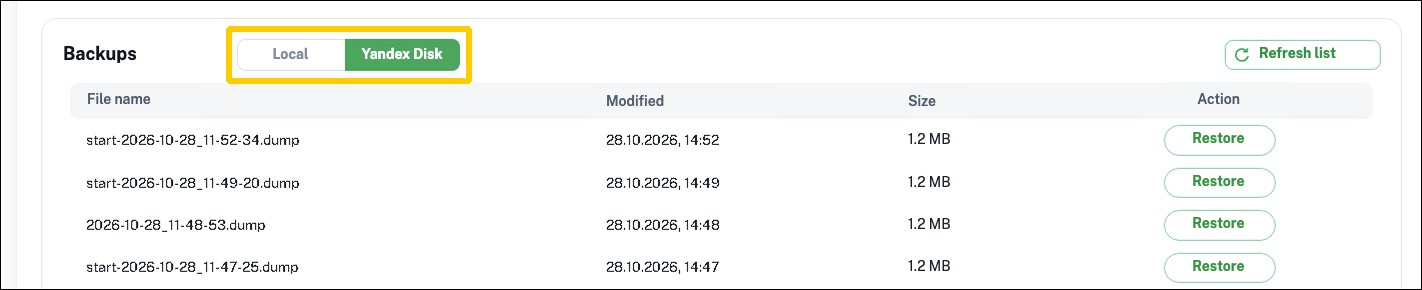
Important: To display the list of backups on Yandex.Disk, you must specify the access key (token) and the cloud folder in the settings; otherwise Yandex.Disk is not connected. The list of backups on the server is always displayed.
4. Restoring from a backup
Restoring from a backup lets you return the system to its state at the time the backup was created. This is useful if objects were accidentally deleted, broadcasts were configured incorrectly, or RiCoder does not work correctly after an update.
Important: The current database and settings will be completely replaced with data from the selected backup. All changes made after the date of this backup will be lost. After the restore, RiCoder will be automatically updated to the current version.
Instructions
- In the web panel, open the Backups section.
- Select the list by backup storage location: Local (on the server) or Yandex Disk.
- Select the file and click Restore in the required row.
- Confirm the start of the restore in the pop-up window.
- Wait for the process to complete. The restore runs in the background:
- The system replaces the current database with data from the backup.
- The update to the current RiCoder version is applied automatically.
- Check objects and broadcasts in the web panel sections.
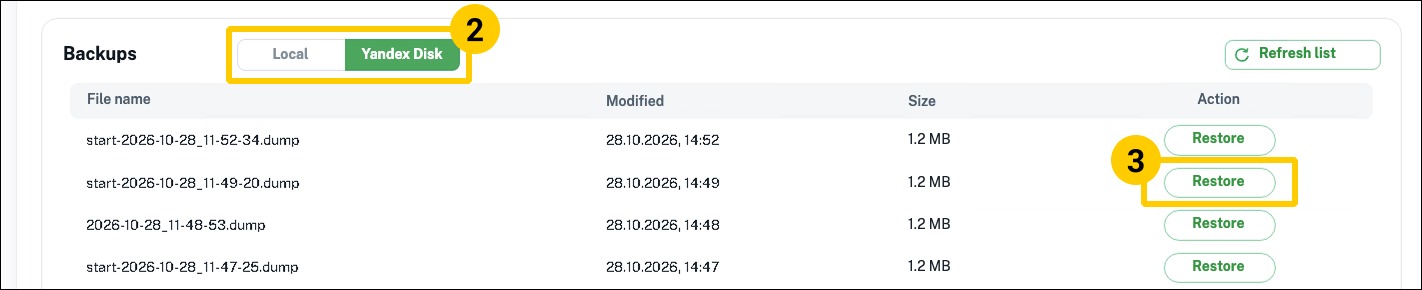
You can restore backups created in older versions of RiCoder. Objects added or deleted after the backup was created will return to their state at the time of the backup.
5. Moving RiCoder to a new server
To restore the RiCoder database and all settings from the old server, you need to:
- Install RiCoder on the new server.
- Place the backup file in the
CHOP_DEPLOY/backupsdirectory on the new server. - Start RiCoder and, in the Backups section settings, click Save backup settings at least once. Without the settings, the restore will return the message "Backup settings have not been saved yet".
- Refresh the list of backups.
- The backup will automatically appear in the list of backups available for restore. Learn more about restoring a backup...
File name requirements:
- Extension:
.dump - Allowed characters: Latin letters, digits, dot, hyphen (
-) and underscore (_). - If the file name does not meet the requirements, rename it before copying.
On the new server, you first need to install RiCoder and click Save backup settings at least once. Without the settings, the message "Backup settings have not been saved yet" will appear.
6. Backup setup
6.1. Schedule
To create or change the schedule:
- Select the schedule type: By interval or At exact time.
- Specify the required interval or time (HH:MM).
- Click the Save backup settings button.
Important:
1. Saving the settings does not create a backup: the next backup will be created with the new settings according to the schedule.
2. If uploading backups to Yandex.Disk is configured, enter the token again each time you save the settings, even if you only change the schedule.
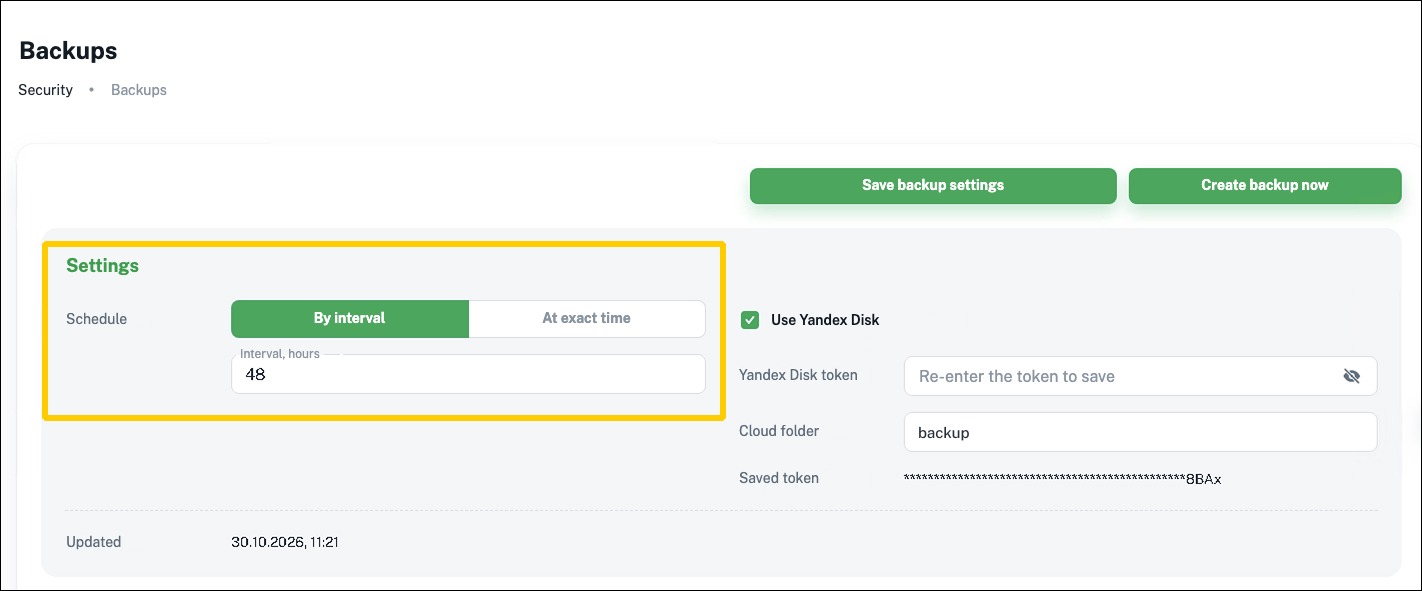
6.2. Uploading to Yandex.Disk
6.2.1. Preparation
To set up RiCoder backups to Yandex.Disk, you need:
- A Yandex account. Learn more about getting an account
- An access token for Yandex.Disk. Learn more about getting a token
Setting up the backup directory on Yandex.Disk
This is the folder where RiCoder will save dump files.
You can:
- Specify the folder name in the RiCoder interface (the folder will be created at the first upload to Yandex.Disk).
- Create the directory on Yandex.Disk in advance and specify its name in the RiCoder web panel.
Folder name recommendation
Use a simple name of Latin letters and digits (for example, RiCoder_Backups). Do not specify a full path (the / character at the beginning or end of the folder name) and avoid spaces.
6.2.2. Connecting Yandex.Disk in RiCoder
To upload backups to Yandex.Disk:
- Select the Use Yandex Disk checkbox.
- Fill in both fields: Yandex Disk token and Cloud folder.
- Click the Save backup settings button.
- If both fields are filled in, backups are duplicated to Yandex.Disk.
- If both fields are empty, backups are saved only locally on the server.
Important:
1. Filling in only one of the fields is not allowed.
2. The token must be entered again each time you save the settings, even if only the schedule changes.
3. Saving the settings does not create a backup: the next backup will be created with the new settings according to the schedule.
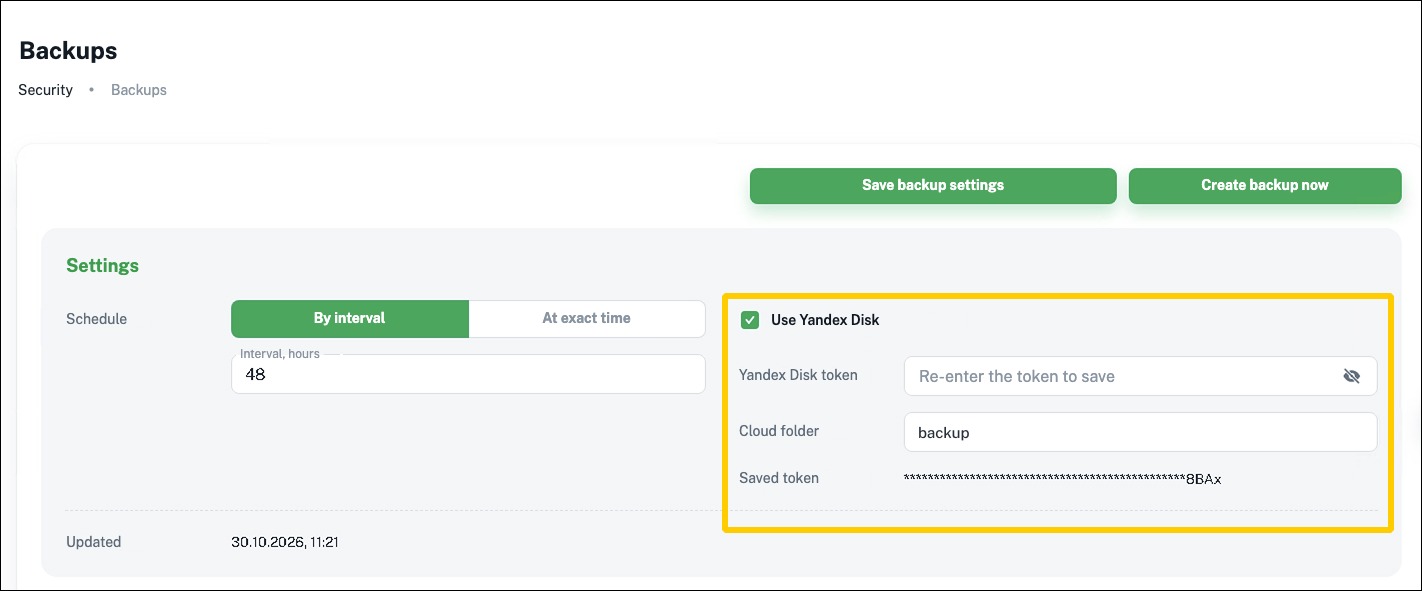
6.2.3. Reconfiguring Yandex.Disk
Situations in which you need to change the Yandex.Disk settings:
- The Yandex.Disk token has expired (1 year).
- The Yandex.Disk account has changed.
In these situations:
- Select the Use Yandex Disk checkbox.
- Fill in both fields with the new data: Yandex Disk token and Cloud folder.
- Click the Save backup settings button.
7. Changing the local folder for backups
By default, RiCoder saves local backups to the CHOP_DEPLOY/backups folder. To store backups in another folder on the server, change the path in the .env configuration file.
Note: To apply the changes, you will need to restart RiCoder (the RiCoder containers in Docker) from the console (command line). Make sure you have SSH access to the server with RiCoder installed or direct access to its console.
Instructions:
1. Open the console.
2. Go to the RiCoder installation directory (CHOP_DEPLOY).
3. Open the .env file and add (or change) the BACKUP_LOCAL_DIR variable, specifying the full path:
Windows:
BACKUP_LOCAL_DIR=D:\rihome-backupsLinux:
BACKUP_LOCAL_DIR=/home/user/rihome-backups4. Make sure the new folder exists and is writable.
5. From the CHOP_DEPLOY folder, run the command:
docker compose --env-file=.env up -d --force-recreate backupdb server6. In the web panel, check that the new path appears in the Local folder field (read-only).
Last updated: 11/12/2026
No comments to display
No comments to display