
Installing Docker Desktop on Windows 10/11
If Docker Desktop is already installed on the server, launch Docker Desktop and go to the section Working with the RiCoder installation wizard.
Installing Docker Desktop using the installation wizard (GUI)
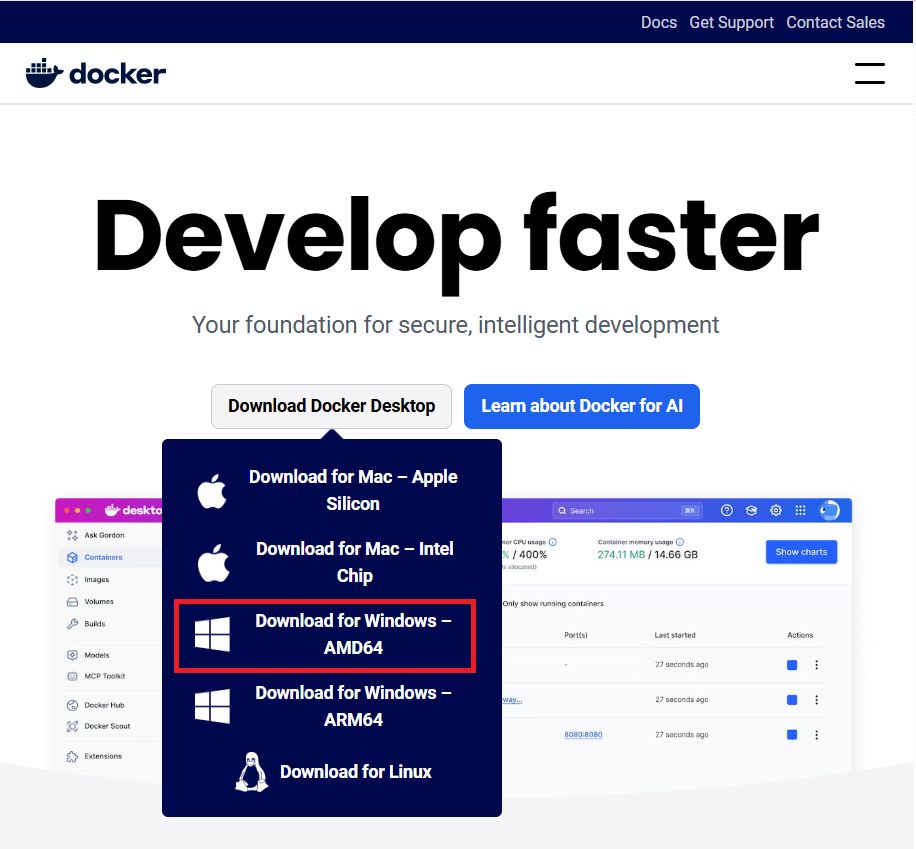
- Download the Docker Desktop installer from the official website docker.com. Click Download Docker Desktop and select the distribution from the list for Windows OS and AMD64 processor.
The latest version of Docker Desktop is in the [changelog](https://docs.docker.com/desktop/release-notes/). The version on the main page [docker.com](https://www.docker.com/) may not be the most up-to-date. If the latest version was not installed, then after installation Docker Desktop will automatically prompt you to update to the latest version.
Docker.com website screen
By default, Docker Desktop will be installed in C:\\Program Files\\Docker\\Docker.
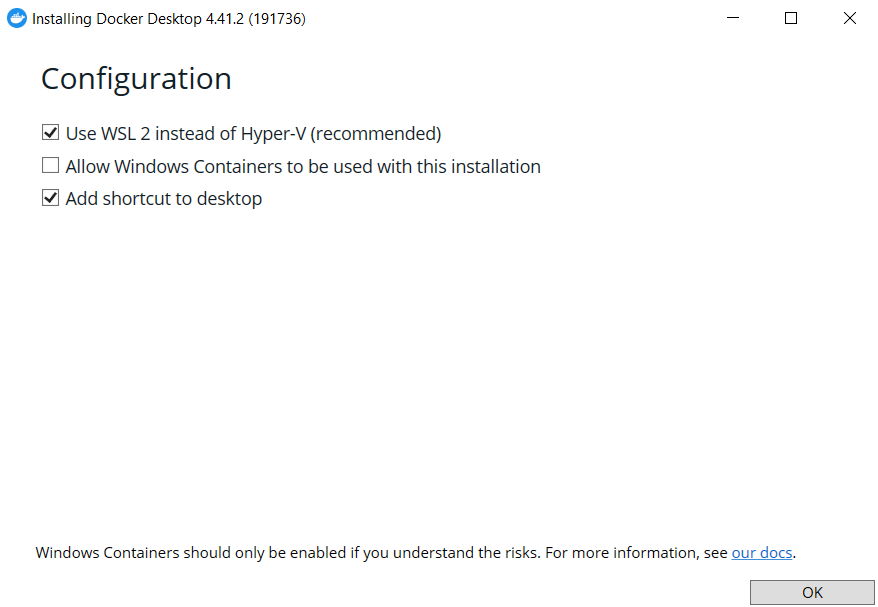
- Configure the installer settings.
For correct installation of RiCoder, use standard Docker Desktop settings, if there are no special network requirements - this guarantees stable operation of the system.
Leave the first two parameters as default and click OK.
Docker Desktop settings screen
- PWhen the User Account Control (UAC) window appears, confirm permission to make changes on the device, otherwise the installation will be interrupted.
More details about authorization errors in the section [Errors and solutions](https://wiki.ridom.ru/books/frequently-asked-questions).
5. Once the installation is complete, a dialog box will appear:
- Click Close.
- Restart the server to apply the changes.
More details about the features of installing Docker Desktop on the website [docs.docker.com](https://docs.docker.com/desktop/setup/install/windows-install/).
Launch Docker Desktop
The installation and operation of RiCoder depends on the operation of Docker Desktop - make sure that Docker Desktop is active before installing and using the service.
Docker Desktop requires manual startup after installation and does not start automatically.
1. To launch Docker Desktop, use the created shortcut on your desktop andor find DockerDesktop via Windows search and run it.
Configure Docker autorun on your server for stable operation of RiCoder. 1. Using the Windows system service “Docker Desktop Service” in Windows settings; 2. In the Docker Desktop settings.
Configuring autorun only through Docker Desktop (in the application settings) may not work in some cases after rebooting the server. Therefore, to be on the safe side, you should check and enable autorun through Windows system services. More details about configuration methods in the section [Configuring Docker autorun.](https://wiki.ridom.ru/books/instructions-in-english/page/working-with-the-ricoder-installation-wizard-YgH)
2. The Docker Subscription Service Agreement window will open. Click Accept to accept the terms of the agreement.
1. Docker Desktop will not work unless you agree to the terms of the agreement. 2. You can accept the agreement later after you launch Docker Desktop. For this: - launch Docker Desktop - go to the section **Settings** → **Resources** → **Docker Subscriptions** and agree to the terms.
3. Docker Desktop will ask you to register and complete a welcome survey. These steps are optional and you can skip this step.
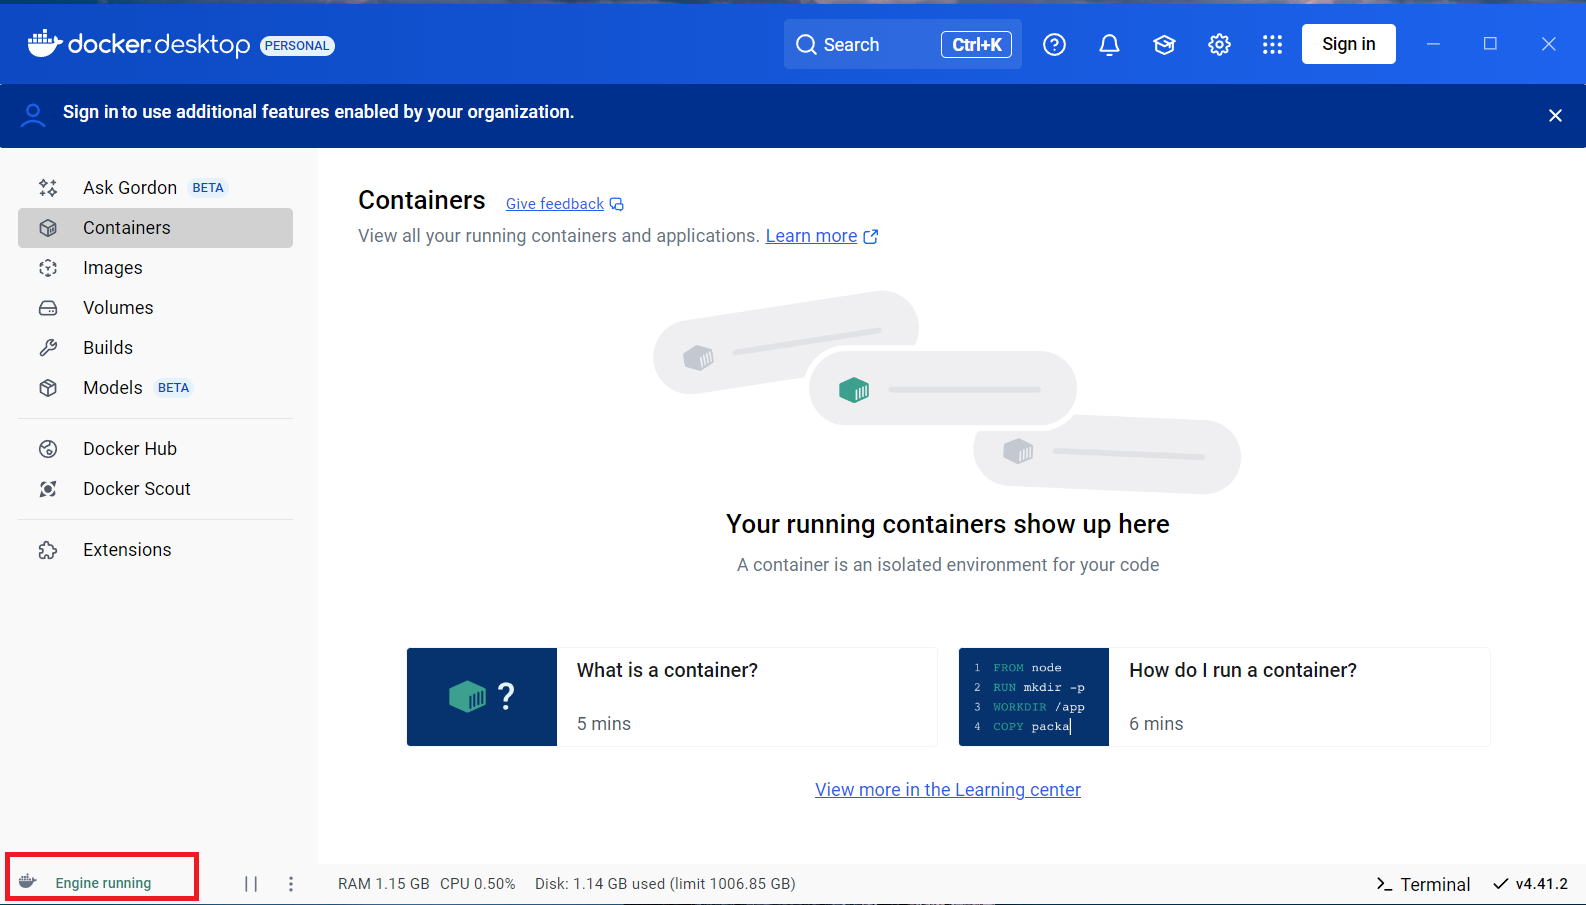
4. If the previous steps were completed correctly, then Docker Desktop is running and ready to install RiCoder. In Docker Desktop menu (whale icon  ) there should be a status - Engine Running.
Containers panel screen
Configuring Docker autostart
RiCoder requires Docker to be constantly active in the background for it to work correctly. This is necessary because RiCoder uses Docker containers for its operation, including managing network connections and other system resources.
To have Docker start automatically when the system starts, configure the Windows service “Docker Desktop Service” - recommended way to configure autostart.
Method 1. Configuring autorun using the Windows system service “Docker Desktop Service”
1. In Windows taskbar click Start and enter the word services.
Search bar screen Windows

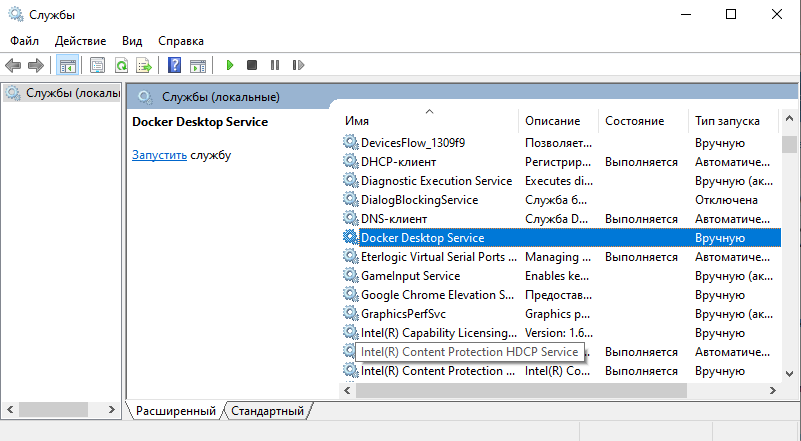
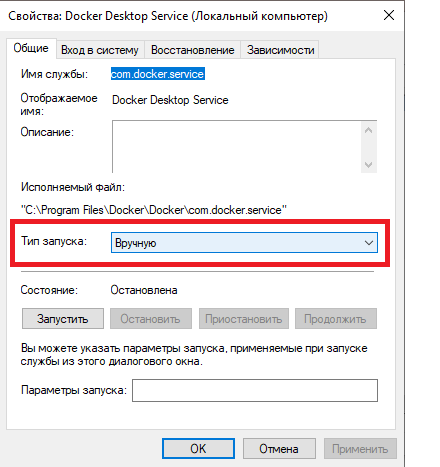
3. Find the service Docker Desktop Service in the list and check the value in the columns Startup type and State.
Windows Services Screen
| **Startup type:**Manual
State: empty field | Service settings need to be changed. |
| **Startup type:** Automatic
State:Running | The Docker autostart service is running. No settings changes are required. Close the Windows Services window. |
4. To change service settings, double-click on Docker Desktop Services and go to the service editing window.
Docker service screen
6. Pcheck whether the settings have changed Docker Desktop Services in the Windows System Services window. The values must be: Launch type - Automatic, State - Running.
7. Pafter the service has successfully started, click Apply and then OK in the dialog box Docker Desktop Services.
8. Zclose the Windows system services dialog window.
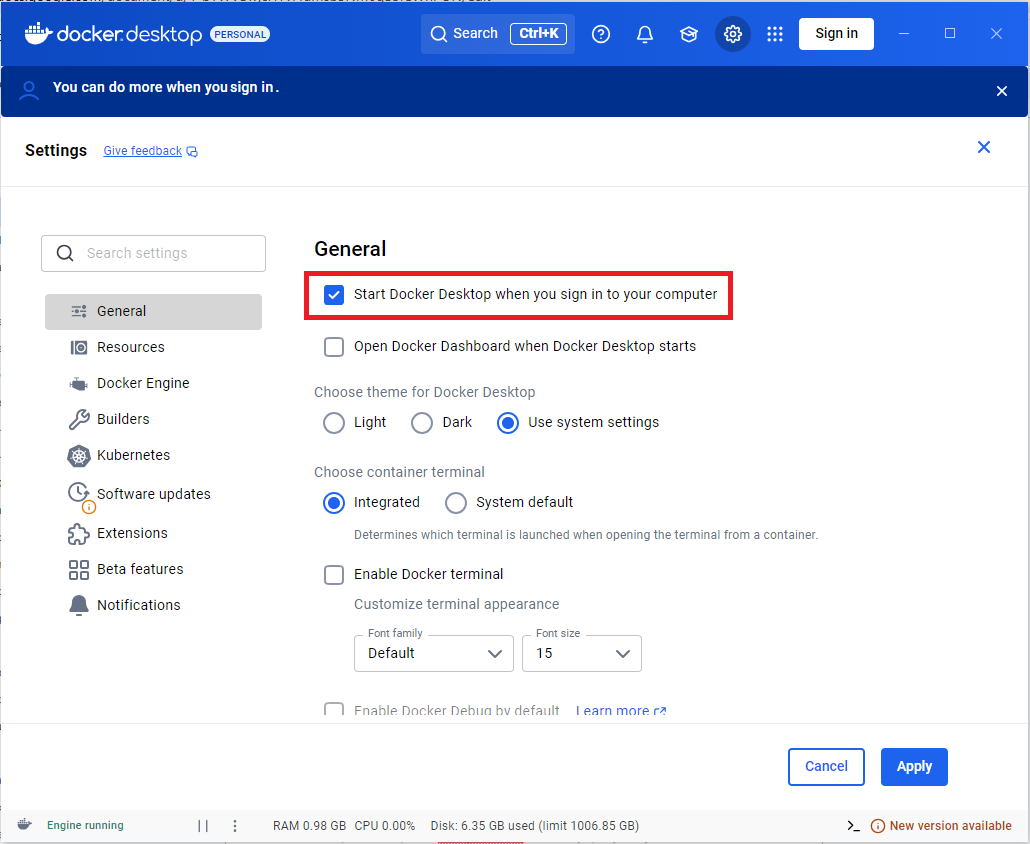
Method 2. Setting up autorun in Docker Desktop
Configuring autorun only through Docker Desktop (in the application settings) may not work in some cases. Therefore, to be on the safe side, you should check and enable autorun through Windows system services.
1. Open Docker Desktop and go to the settings section. Sign  in the top menu.
Docker Desktop menu screen

Docker Desktop settings screen
Нет комментариев для отображения
Нет комментариев для отображения