
Setting up event broadcasting
The article describes how to set up the broadcast of events from the Ri-HUB control center installed at the monitoring site to the central monitoring point (CMS) and make sure that events are correctly transmitted from the Ri-HUB to the CMS. The instructions are step-by-step, with explanations of key parameters and recommendations for configuration.
To set up the broadcast of events from Ri-HUB to the monitoring station of a security organization, you need to:
- OOpen the RiCoder admin web panel.
- Add a monitoring station server to which events from Ri-HUB will be broadcast.
- Create event broadcast template.
- Connect the monitoring object to the broadcast template.
1. Adding a broadcast server (MS)
You can read about the features of interaction between RiCoder and the Security Center software server in the article [Integration of RiCoder software with Security Center software (C-Nord)](https://wiki.ridom.ru/books/instructions-in-english/page/integration-of-ricoder-software-with-security-center-software-c-nord#bkmrk-%D0%9D%D0%B0%D1%81%D1%82%D1%80%D0%BE%D0%B9%D0%BA%D0%B0-%D1%81%D0%B5%D1%80%D0%B2%D0%B5%D1%80%D0%B0-%D0%9F%D0%9E)
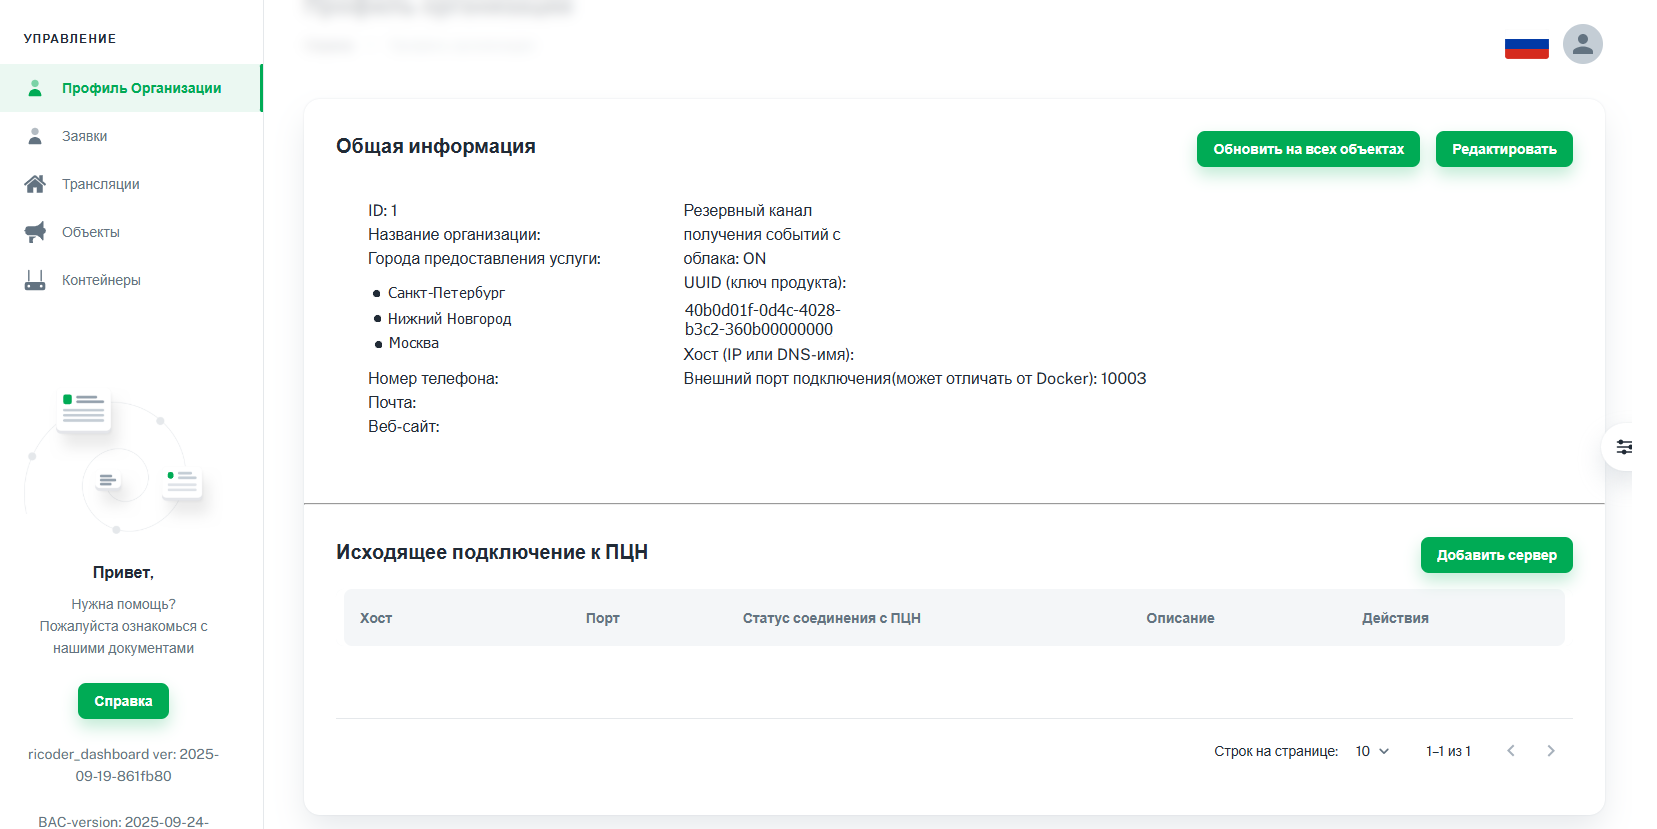
1. Select in the side left menu Organization profile.
RiCoder screen: Organization profile
3. Enter Host and Port server that will receive events from RiCoder. Click Add Server.
RiCoder screen: Adding a monitoring station server
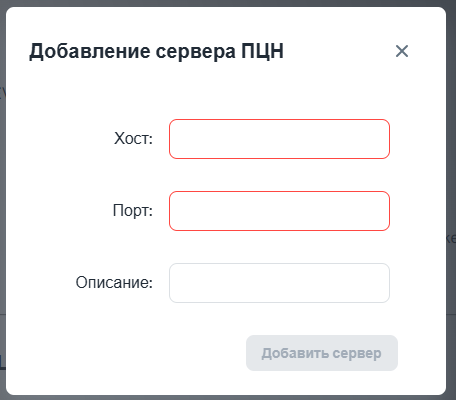
Use the public IP address or DNS name of the monitoring station server if the server receiving messages from RiCoder is accessible by DNS name.
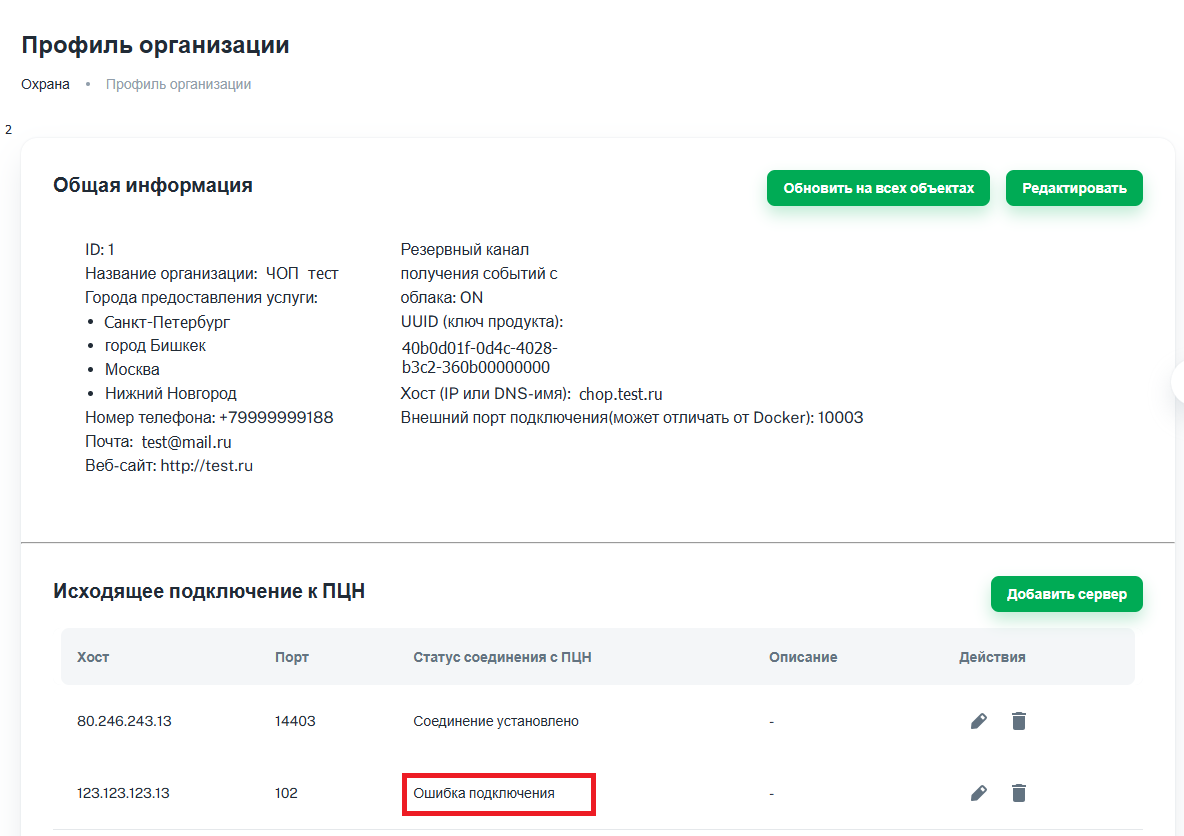
4. Server monitoring station added to the list Outgoing connection to the monitoring station, in the column Status of connection to the monitoring station status is displayed Connection error, go to next section to create a broadcast.
**RiCoder** initiates a connection check to the monitoring station only if the specified monitoring station server address is associated with the broadcast. If there is no broadcast associated with the monitoring station server, then the status will always be **Connection error**.
RiCoder screen: Server status
1. Select Broadcasts. from the side left menu
Screen list of broadcasts

Broadcast screen

The name of the broadcast template and additional information about the template should be brief: up to 15 characters.
4. If necessary, fill in the field Additional information.
5. In the Monitoring station server field, select the required server from the list.
A prerequisite for creating a broadcast is to select the monitoring station server to which the events will be broadcast.
The list **Monitoring station server** displays the servers that you previously added in the **Organization profile** section. More details in section [Adding a broadcast server ](https://wiki.ridom.ru/books/instructions-in-english/page/setting-up-event-broadcasting#bkmrk-1.-%D0%94%D0%BE%D0%B1%D0%B0%D0%B2%D0%B8%D1%82%D1%8C-%D1%81%D0%B5%D1%80%D0%B2%D0%B5%D1%80-%D1%82).
6. Set the ping period from RiCoder to your monitoring station server in the field Connection control period.
- The period is set in seconds.
- Values from 1 to 500 seconds are allowed.
- Recommended value: 100 seconds.
- To reduce network load (traffic), set this parameter to a higher value.
Ping monitoring the presence of communication is necessary to maintain an up-to-date connection between the monitoring station and RiСoder. It is impossible to disable ping. In the absence of frequent events from Ri-HUB, RiСoder transmits test events to the monitoring station over an open connection to monitor the presence of communication. You can view the results of the connection availability ping in the monitoring station server logs, if possible.
7. Set timeouts for monitoring the Ri-HUB connection to RiCoder.
Timeouts control the Ri-HUB connection to RiCoder and are a general setting of the broadcast template. The setting will be applied to all objects (Ri-HUB) connected to this broadcast template.
- Timeout for sending break event (7.0.1)
- Timeout for sending recovery event (7.0.0)
Recommended value for **Timeout for sending recovery event (7.0.0):** not lower than 30. With values above 30 seconds, events are guaranteed to be sent and processed. Value **Timeout for sending the break event (7.0.1)** can be anything.
1. To avoid transmission of frequent events from Ri-HUB, do not set the minimum values. 2. If the connection is poor, frequent reconnections of Ri-HUB to RiCoder are possible.
8. Configure the matching of RiDom and Ademco codes.
If you do not want to transmit any RiDom code from the facility to the monitoring station, select the corresponding RiDom code in the field **Ademco code** value **Do not use in broadcast.**
New Ridom codes are added as the functionality of the Ri-HUB control centers is expanded. When updating the RiCoder software, the list of broadcast codes will be updated with new combinations. Ensure that the code mapping in the broadcast template remains valid after the update.
9. If necessary, add an Ademco code if you do not find what you need in the list. More details in the section How to add an Ademco code?
10. Click Save broadcast.
11. Make sure that the connection between RiCoder and the monitoring station server is established some time after creating the translation template. Go to next section to test the connection.
For additional control of the Ri-HUB connection to RiCoder and maintaining broadcast activity, set up an event for periodic connection testing according to a schedule or interval in the Ri-HUB settings in the Ridom mobile application.
2.1. Checking the connection between RiCoder and the monitoring station server
After creating the broadcast template, its initial status is No connection with the monitoring station.
Screen list of broadcasts
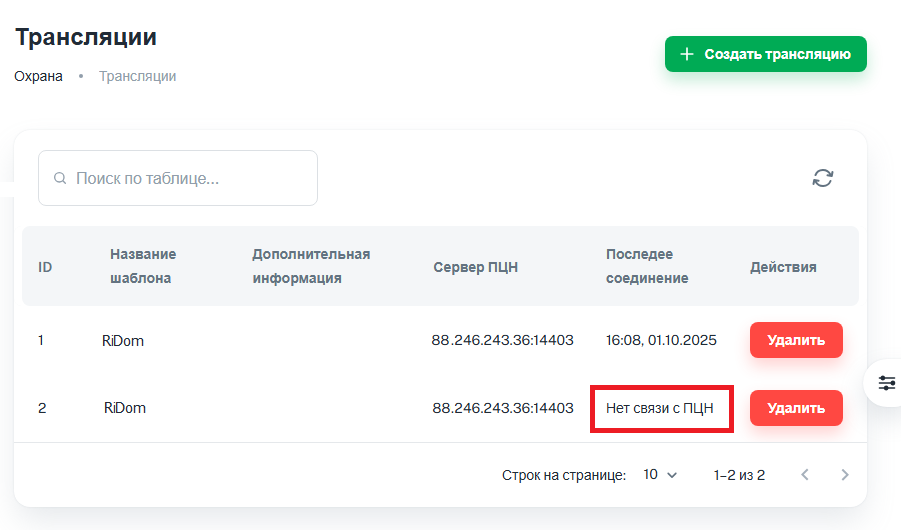
You must wait until the end of the connection monitoring period that you set when creating the broadcast. As soon as RiCoder receives a response from the monitoring station server (ping), the **Last connection** column will indicate the time and date of the last received message from the monitoring station. You can see the ping result only in the monitoring station server logs.
If there was no ping for more than the set time when creating the broadcast template, then there is a problem with connecting RiCoder to the control panel. More information about possible malfunctions...
2. The broadcast template is configured. Go to next section to work with applications from Ri-HUB owners to take objects for monitoring by a security organization.
If necessary, you can edit the broadcast template: set other ping intervals, timeouts, Ademco codes. To do this: 1. Double-click on the line with the desired broadcast. 2. On the page with information about the broadcast, click on the **Edit** button in the upper right corner. 3. Change the data and click **Save Changes**. The broadcast does not stop during the editing process. Changes will be applied immediately after saving.
3. Connecting the surveillance object to the broadcast
3.1. Processing applications for connection to monitoring from Ri-HUB owners
Requests from RiDom users to connect an object (Ri-HUB control center) to monitoring are in the section Requests.
Application synchronization occurs every 30 minutes or upon request. To force synchronization outside of the schedule: 1. Click **Synchronize applications with the RiDom cloud**, button in the upper right corner of the page with a list of applications. 2. Once the sync is complete, you will see a pop-up notification in the top right corner.
Application list screen connecting\\disabling monitoring
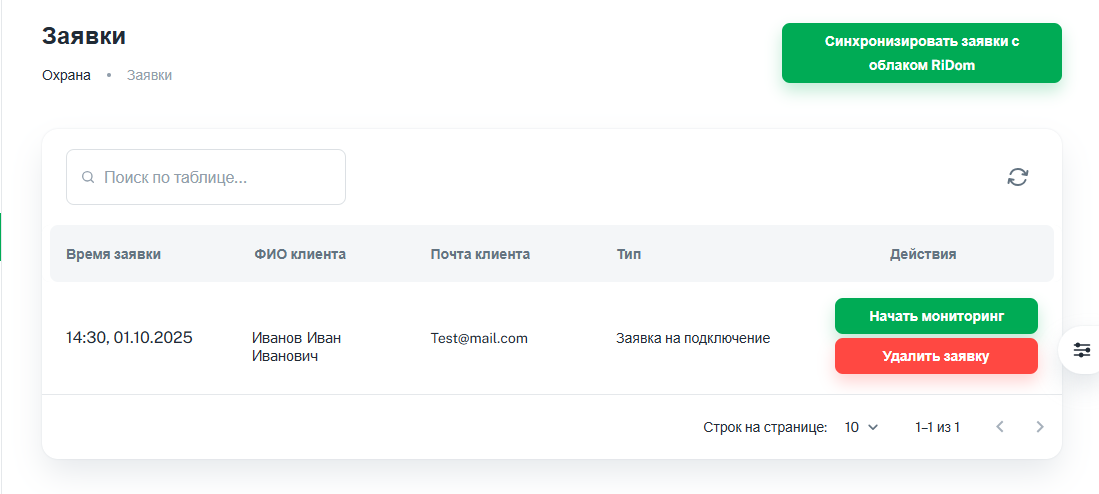
Screen with information about application

If Ri-HUB is offline, the application will not be accepted. [More about fault diagnosis...](https://wiki.ridom.ru/books/osibki-i-reseniia/page/net-sviazi-mezdu-ricoder-i-ri-hub#bkmrk-1.-%D0%9F%D1%80%D0%BE%D0%B2%D0%B5%D1%80%D0%BA%D0%B0-%D1%84%D0%B8%D0%B7%D0%B8%D1%87%D0%B5%D1%81%D0%BA)
4. Click Start monitoring if the owner of Ri-HUB has filled out the data correctly and the object will be placed under surveillance in accordance with the internal rules of your security organization.
Broadcast connection screen
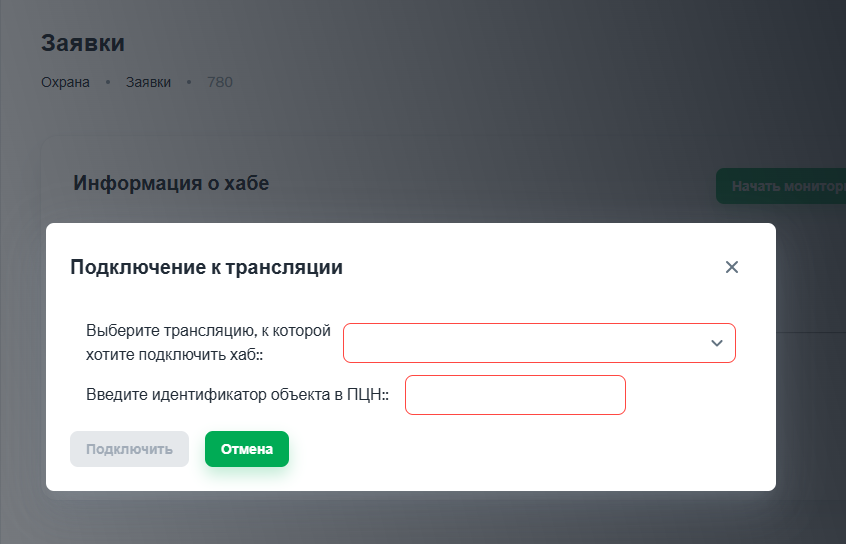
5. Enter object identifier in the monitoring station in accordance with the internal rules of your security organization.
You will see the specified identifier on your monitoring station when receiving messages.
6. Click Connect. Now the object is monitored in your organization. You can find information about the connected object in the Objects. section
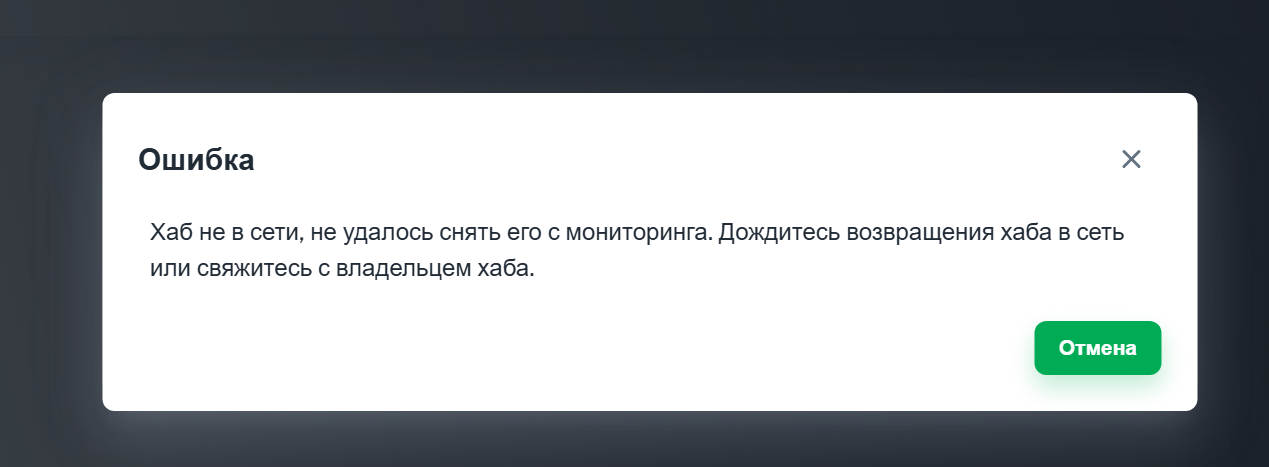
If Ri-HUB is offline, an error message will appear. The connection will fail. The application of the owner of Ri-HUB will remain in the list **Requests** - without changes.
RiCoder screen: Ri-HUB connection error message
3.2. Checking the operation of broadcasting events from Ri-HUB to the monitoring station
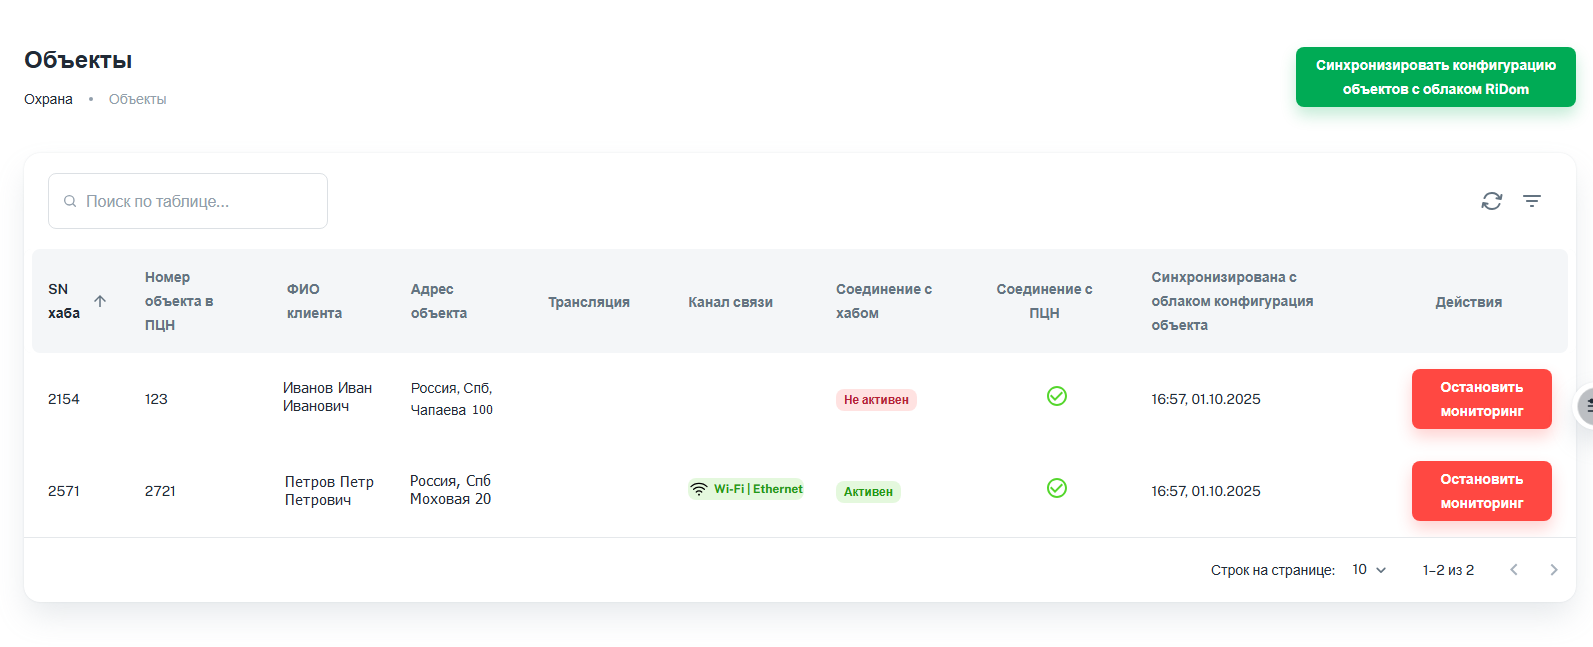
1. From the side menu of the RiCoder admin web panel, select Objects.
2. Find the recently created object in the list. Visually or using search.
3. Check the statuses. The broadcast works correctly if the statuses are indicated in the corresponding columns of the table:
- Connections to the Hub - Active, there is a connection between RiCoder and Ri-HUB.
- Connection to the monitoring station - green checkmark (
 ), means that events can be broadcast.
Screen list of objects
4. Check whether events from RiCoder reach the monitoring station. If they do not reach, then carry out diagnostics and fix the problem. More...
5. If statuses are displayed:
- Connections with the Hub - Not active, no connection with Ri-HUB. More information about troubleshooting...
- Connection with the monitoring station - red cross (
 ), no connection with the monitoring station. More about troubleshooting...
Update date: 11/13/2025
Нет комментариев для отображения
Нет комментариев для отображения